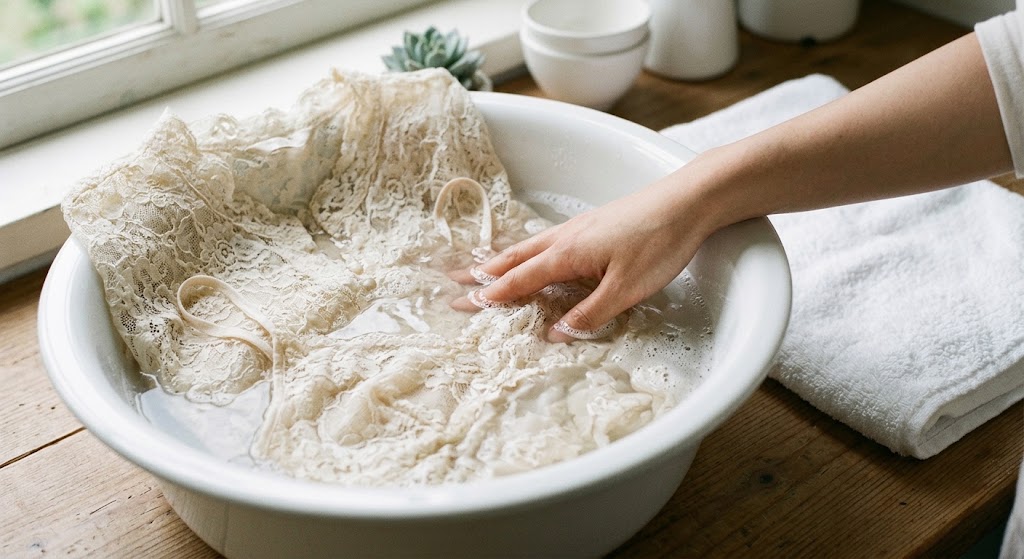
How to Wash Lace Clothes Without Tearing or Stretching Them Lace clothes look beautiful and delicate, but they need careful handling. Rough washing can cause lace to tear, stretch, snag, or lose its shape. With the right washing method, you can keep your favorite lace clothes looking fresh and beautiful for longer. If you want to know how to wash lace clothes, start by checking the care label. The label tells you whether you can hand wash, machine wash, or dry clean the garment. When you wash lace at home, use gentle movements, mild detergent, and cool or lukewarm water when the instructions allow it. In this guide, you will learn how to wash lace clothes safely, how to remove stains, how to prevent stretching and tearing, and how to dry and store lace properly. Why Lace Clothes Need Special Care Lace can contain cotton, polyester, nylon, silk, or a blend of different fibers. Each material may require a different cleaning method, so always check the care label before you start. The open structure of lace makes it more vulnerable to friction and snagging than many regular fabrics. Hooks, zippers, rough fabrics, and heavy clothing can catch the delicate threads during washing. Hot water, strong detergents, aggressive scrubbing, and excessive heat can also damage some types of lace. Gentle lace fabric care helps protect the fabric and maintain its original appearance. How to Wash Lace Clothes Safely Take a few simple steps before you wash your lace clothes. These steps can help prevent unnecessary damage. Check the garment’s care label. Look for loose threads, tears, or weak areas. Close zippers, hooks, and other fasteners. Turn the garment inside out when appropriate. Separate lace from rough and heavy clothing. Choose a mild detergent for delicate fabrics. Avoid bleach unless the care label allows it. Different lace garments need different care. Always follow the instructions for the specific garment instead of using the same washing method for every lace item. How to Wash Lace Clothes by Hand Hand washing gives you more control over the amount of movement and friction your lace clothes receive. It can provide a gentle option for washable lace garments. Follow these steps to hand wash lace clothes: Fill a clean basin or sink with cool or lukewarm water. Add a small amount of mild detergent. Place the lace garment in the water. Move the garment gently through the water. Let the garment soak only for the time recommended on the care label. Rinse the garment carefully with clean water. Do not scrub the lace aggressively. Avoid twisting, pulling, or wringing the garment. These actions can stretch delicate threads and change the shape of the fabric. How to Wash Lace Clothes in a Washing Machine You can machine wash some lace clothes, but always check the care label first. Some garments require hand washing or professional cleaning. If the label allows machine washing, place the lace garment inside a mesh laundry bag. The bag helps reduce contact with other clothing and lowers the risk of snagging. Choose gentle settings such as: A delicate or gentle cycle Cool or cold water when the label recommends it A mild detergent A gentle or low-spin setting when available Do not overload the washing machine. Give delicate garments enough space to move without rubbing against heavy clothing. Keep lace away from clothing with exposed hooks, rough zippers, heavy decorations, or other features that could catch the fabric. How to Prevent Lace From Tearing Preventing tears plays an important role in how to wash lace clothes correctly. Friction and snagging can damage delicate lace during washing. Inspect your garment before washing it. Look for loose threads, small tears, or weak areas. If you find damage, handle that area carefully and consider repairing it before washing. When you hand wash lace, move the garment gently through the water. Do not rub the fabric against itself. When you use a washing machine, place the garment inside a mesh laundry bag if the care label allows machine washing. Keep lace away from sharp objects, rough surfaces, hooks, and exposed zippers. How to Prevent Lace From Stretching Wet lace can stretch easily when you pull, twist, or handle it roughly. Take extra care with the garment immediately after washing. Never wring lace to remove water. Instead, gently press out excess moisture. You can also place the garment on a clean towel and press the towel gently against the fabric. Do not pull the garment into shape while it remains very wet. Handle it gently and follow the drying instructions on the care label. How to Remove Stains From Lace Clothes Deal with stains carefully because aggressive rubbing can damage lace. Start by checking the care label. Make sure the cleaning method suits the fabric before you treat the stain. For washable lace, apply a small amount of mild detergent to the stained area if the care instructions allow it. Gently work the detergent into the fabric instead of scrubbing hard. Avoid strong stain removers and bleach unless the manufacturer specifically recommends them for the fabric. For valuable, vintage, silk, or very delicate lace garments, consider professional cleaning when a stain proves difficult to remove. How to Dry Lace Clothes Without Stretching Them Proper drying matters just as much as proper washing. Incorrect drying can cause lace to stretch, lose its shape, or suffer heat damage. Never wring or twist wet lace. Gently press out excess water instead. You can also use a clean towel to absorb moisture. Check the care label before you choose a drying method. Some garments need flat drying, while others may allow another method. Avoid excessive heat unless the care instructions specifically allow it. High temperatures can affect some fibers and change their shape or texture. Handle wet lace carefully and avoid pulling the garment while it dries. Can You Wash Lace Clothes in the Washing Machine? Yes, you can wash some lace clothes in a washing machine. However, the care label

How to Wash Clothes With Zippers, Buttons and Other Fasteners Clothing fasteners may seem like small details, but zippers, buttons, hooks, snaps, buckles and other hardware can affect how your clothes should be washed. When fasteners are left open or handled incorrectly, they can snag other garments, scratch delicate fabrics, become damaged or put unnecessary stress on seams. Learning how to wash clothes with zippers, buttons and other fasteners can help extend the life of your favorite jeans, jackets, shirts, uniforms, dresses, sweaters and everyday clothing. A few simple preparation steps before putting clothes into the washing machine can make a big difference. The good news is that you usually do not need a complicated laundry routine. The key is to check the care label, prepare the fasteners correctly, choose a suitable wash cycle, avoid overcrowding the machine and dry the garment according to its fabric and care instructions. Why Fasteners Matter When Washing Clothes Zippers, buttons, hooks, snaps and buckles are often made from materials that behave differently from the fabric around them. Metal and hard plastic components can rub against clothing during the wash cycle, while open hooks or zippers can catch on other garments. Inside a washing machine, clothes constantly move, tumble and rub against one another. This mechanical movement is an important part of cleaning, but it can also create friction between garments and their fasteners. For example, an open zipper can catch on a knitted sweater. A bra hook can snag a delicate shirt. A loose button can pull against its thread. A metal buckle can rub against another garment and create marks or scratches. Properly preparing fasteners before washing helps reduce these problems while allowing your clothes to get thoroughly cleaned. Always Check the Care Label First Before washing any garment, check its care label. The label provides important information about whether the item can be machine washed, hand washed or dry cleaned, as well as recommended water temperature, drying method and other care instructions. This step is especially important for clothing with decorative buttons, leather details, delicate trims, coated zippers or specialty hardware. If a garment says dry clean only, do not automatically assume that it is safe to put into the washing machine simply because the main fabric looks washable. Some garments have special construction, trims, buttons, dyes or other components that may be damaged by water or machine agitation. When in doubt, follow the manufacturer’s care instructions rather than relying on the appearance of the fabric. Should You Zip Clothes Before Washing? In most cases, it is a good idea to close zippers before washing clothes. A closed zipper is less likely to catch onto other garments during the wash cycle. Open zippers have exposed teeth and edges that can grab onto knitwear, lace, thin fabrics and other clothing. They can also become bent or damaged if they repeatedly catch against other items. Before placing a garment with a zipper into the washing machine: Check that the zipper is not damaged. Remove anything from the zipper area or pockets. Zip the garment completely. Make sure the zipper pull is positioned securely. Turn delicate garments inside out if recommended by the care label. Closing zippers is particularly useful for jeans, hoodies, jackets, sweatshirts, trousers, children’s clothing and other garments with exposed zipper teeth. How to Wash Clothes With Metal Zippers Metal zippers can be more abrasive than soft fabric components, so preparation is important. Close the zipper before washing and check that there are no sharp, bent or broken teeth. If the garment is heavily decorated or contains other metal hardware, separate it from extremely delicate clothing whenever possible. For everyday washable garments, use the wash temperature and cycle recommended on the care label. Avoid unnecessarily aggressive washing if the garment does not require it. After washing, inspect the zipper before drying. If the zipper has become bent, stuck or damaged, repair it before the garment is washed again. How to Wash Clothes With Plastic Zippers Plastic zippers are common on sportswear, jackets, children’s clothing, bags and casual garments. They are generally lightweight, but they can still catch onto other clothing if left open. Close plastic zippers before washing and follow the garment’s care instructions. If the item is made from a delicate synthetic fabric, a gentle or delicate cycle may be appropriate. Do not force a zipper that is already stuck. A damaged zipper can become worse during washing and may eventually pull away from the fabric. Should You Button Clothes Before Washing? Buttons require a little more consideration because different types of buttons react differently to washing. For shirts and similar garments, many people prefer to leave most buttons undone while washing. This can reduce unnecessary stress on the button threads and buttonholes during the movement of the wash cycle. However, the best approach can depend on the garment’s construction and care instructions. Before washing buttoned clothing: Check the buttons for looseness or cracks. Repair loose buttons before washing when possible. Check the care label. Do not overload the washing machine. Wash delicate garments using an appropriate cycle. If a button is already hanging by a few threads, washing the garment without repairing it first can cause the button to come off completely. How to Protect Buttons From Damage Buttons can break when they are repeatedly pulled, twisted or pressed against other items. Large decorative buttons may be particularly vulnerable. If a garment has oversized, decorative or delicate buttons, turn the garment inside out if the care instructions allow it. This can reduce direct contact between the buttons and other clothing during washing. For particularly delicate garments, consider using a mesh laundry bag. A laundry bag can help reduce rubbing and prevent small components from becoming caught on other items. How to Wash Clothes With Hooks and Eyes Hooks and eyes are common on bras, lingerie, skirts, dresses and other fitted garments. Open hooks can easily catch on fabric during washing. Always fasten hooks before placing these garments in
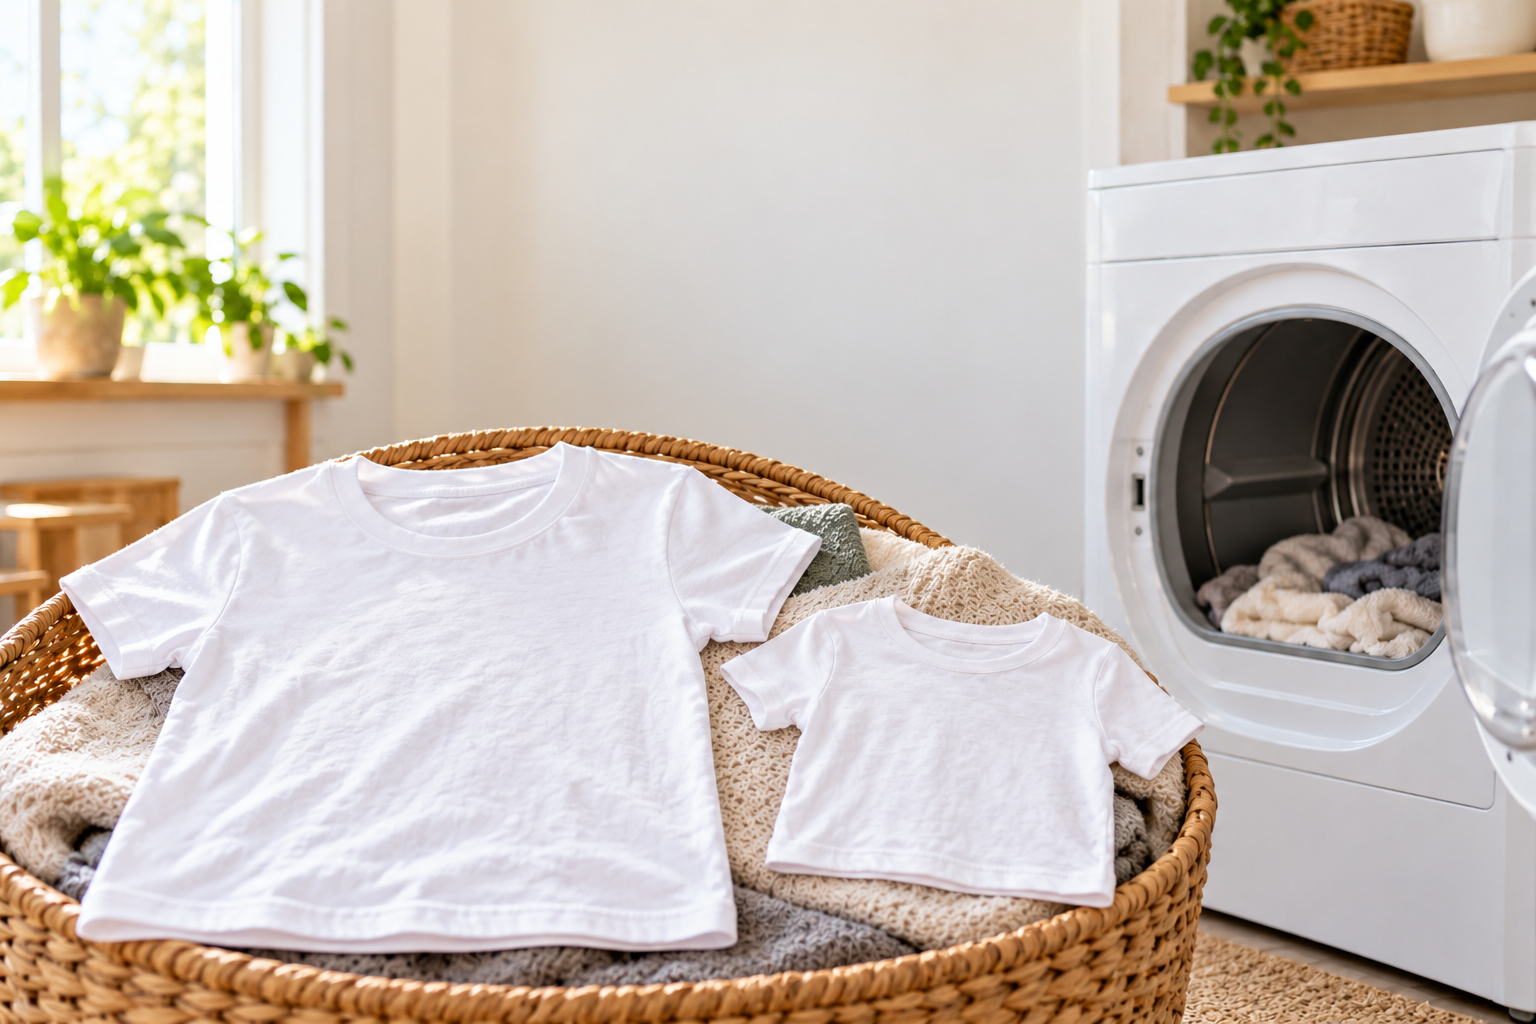
Have you ever taken your favorite shirt, sweater, or pair of pants out of the dryer and noticed that it suddenly feels smaller? If you have wondered why clothes shrink in the dryer, the answer usually comes down to a combination of heat, moisture, fabric type, and mechanical movement. While some fabrics are naturally more resistant to shrinkage, others can change size or shape when exposed to high temperatures. The good news is that you can greatly reduce the risk of shrinkage by choosing the right washing and drying methods. In this guide, we explain why clothes shrink in the dryer, which fabrics are most likely to shrink, and what you can do to keep your clothes looking and fitting properly for longer. Why Do Clothes Shrink in the Dryer? Clothes can shrink in the dryer because heat and moisture affect the structure of certain fibers. When wet clothing is exposed to high temperatures and repeated tumbling, fibers can contract and the fabric may become smaller. Natural fabrics such as cotton and wool are particularly sensitive to unsuitable drying conditions. Some garments may shrink noticeably after just one hot drying cycle, while others may gradually become smaller after repeated exposure to heat. The amount of shrinkage depends on several factors, including the type of fabric, how the garment was manufactured, whether it was pre-shrunk, the drying temperature, and how long it remains in the dryer. Does the Dryer Cause More Shrinkage Than Washing? Both washing and drying can affect the size and shape of clothing, but high dryer temperatures are a major cause of shrinkage for many fabrics. Hot water can cause some fibers to contract, while the combination of heat and tumbling in a dryer can increase fabric stress. This is why a garment that survives a normal wash may still shrink when exposed to a high-temperature drying cycle. If you want to reduce shrinkage, pay attention to both the washing temperature and the drying temperature. Which Fabrics Shrink Most in the Dryer? Not all fabrics respond to heat in the same way. Some materials are much more likely to shrink than others. Fabrics that can be more sensitive to dryer heat include: Cotton Wool Linen Rayon Viscose Cotton blends Some delicate natural fibers Synthetic fabrics such as polyester are generally more resistant to shrinkage, but excessive heat can still affect their shape, texture, elasticity, or overall appearance. Why Does Cotton Shrink in the Dryer? Cotton is one of the fabrics most commonly associated with shrinkage. Cotton fibers naturally respond to moisture and heat, and the manufacturing process can leave some fabrics with room for further contraction. When cotton clothing is repeatedly exposed to high temperatures in a dryer, the fibers can tighten and the garment may become smaller. To help protect cotton clothing, check the care label and use a low or moderate drying temperature when recommended. Air drying can also reduce exposure to dryer heat. Why Does Wool Shrink in the Dryer? Wool requires special care because heat, moisture, and agitation can cause wool fibers to contract and become tightly interlocked. This process can lead to significant shrinkage and may also change the texture of the garment. Some wool garments should never be tumble dried. Always check the care label before putting wool clothing in a dryer. If the instructions recommend drying flat, gently reshape the garment while it is damp and lay it flat to dry. Can Clothes Shrink on Low Heat? Yes, some clothes can still shrink on a low-heat setting. However, lower temperatures generally reduce the risk compared with high-heat drying. The fabric itself is an important factor. Cotton, wool, linen, and other sensitive materials may still change size even when the dryer is not set to its highest temperature. If a garment is particularly prone to shrinkage, air drying according to the care instructions may be a safer option. Can Over-Drying Cause Clothes to Shrink? Over-drying can expose clothing to unnecessary heat for an extended period. Even if the dryer is operating at a moderate temperature, excessive drying time can increase wear and fabric stress. When possible, remove clothes once they are dry instead of allowing them to continue tumbling through an unnecessarily long cycle. How to Prevent Clothes From Shrinking in the Dryer The best way to prevent dryer shrinkage is to control heat, drying time, and fabric handling. Follow these simple steps: Check the care label before drying. Use the recommended dryer temperature. Choose low heat for suitable delicate fabrics. Avoid unnecessary high-temperature cycles. Remove clothes promptly when they are dry. Air dry garments when the care label recommends it. Dry wool and other delicate fabrics using their recommended method. Avoid over-drying clothing. Separate garments according to their drying requirements. Always Check the Clothing Care Label The care label is one of the easiest ways to determine how a garment should be dried. It tells you whether the item can be tumble dried and, when applicable, which temperature is appropriate. Common drying instructions include: Tumble dry Tumble dry low Tumble dry medium Tumble dry high Do not tumble dry Dry flat Line dry If the label says do not tumble dry, avoid putting the garment in the dryer. Choose the recommended drying method instead. Use Low Heat for Delicate Clothes Low heat can be useful for clothing that is sensitive to high temperatures. It can reduce the amount of heat stress placed on the fabric while still allowing suitable garments to be machine dried. However, low heat does not guarantee that a garment will never shrink. Always consider the fabric type and follow the manufacturer’s care instructions. Air Dry Clothes to Reduce Dryer Shrinkage Air drying is one of the simplest ways to avoid dryer-related shrinkage because it eliminates the high heat produced by a conventional dryer. Depending on the garment, you can use a drying rack, clothesline, or another suitable drying method. Be careful with heavy sweaters and knitwear. Some garments can stretch when hung while wet, so they
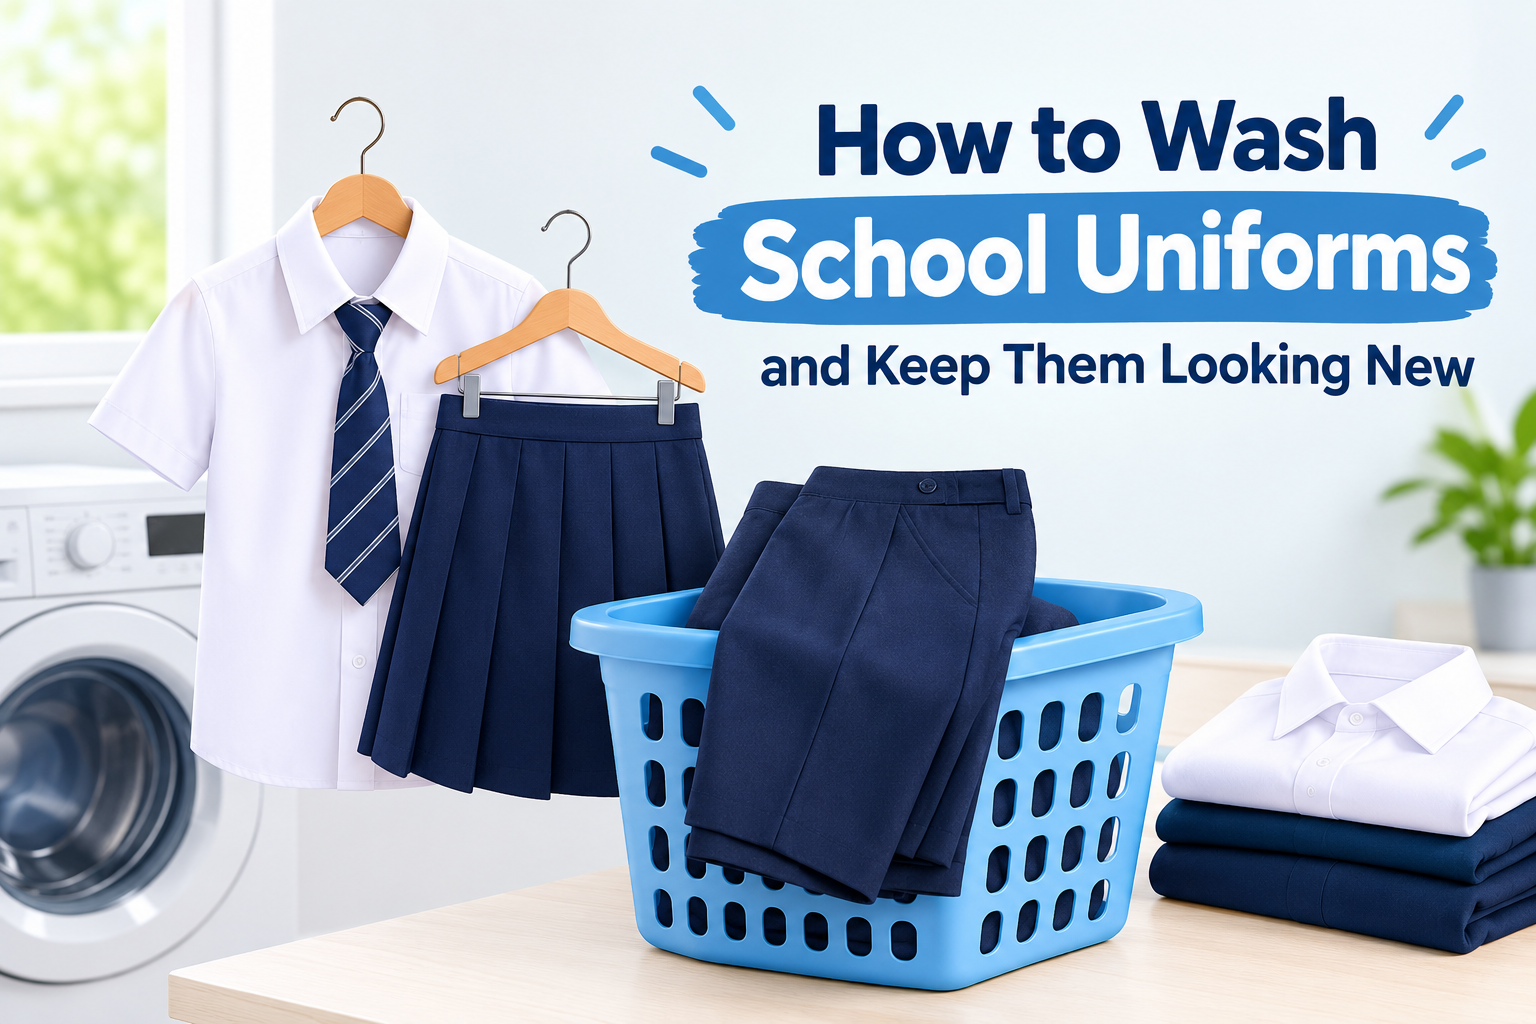
How to Wash School Uniforms and Keep Them Looking New School uniforms go through a lot. From playground dirt and food spills to sweat, ink, grass, and everyday wear, uniforms can quickly look faded or worn if they are not washed correctly. The good news is that you do not need complicated methods to keep school uniforms clean and in good condition. The key is to follow the care label, use the right washing method, treat stains early, and avoid washing or drying the fabric too aggressively. This guide explains how to wash school uniforms properly, remove common stains, prevent fading and shrinking, and keep uniforms looking newer for longer. Check the Care Label Before Washing Before putting a school uniform in the washing machine, check the care label on the garment. Different materials can require different washing temperatures, cycles, and drying methods. Look for instructions about: Recommended washing temperature Machine washing or hand washing Bleach restrictions Tumble drying Ironing temperature Dry-cleaning requirements Following these instructions can help prevent problems such as shrinking, color fading, fabric damage, and loss of shape. Empty Pockets and Prepare the Uniform Always check every pocket before washing. Pens, tissues, paper, coins, and other items can cause stains or damage during a wash cycle. Before washing: Empty all pockets. Remove badges or detachable accessories if recommended. Close zippers. Fasten buttons and hooks. Turn printed or decorative garments inside out. Separate heavily stained items for pre-treatment. These simple steps can help protect both the uniform and other clothes in the same load. Separate Uniforms by Color Sorting laundry is especially important when washing school uniforms. Keep dark uniforms away from white or light-colored clothing to reduce the risk of color transfer. If a uniform is new, wash it separately the first few times if you are unsure whether the dye may bleed. A useful basic system is: Dark uniforms: Wash with similar dark colors. White shirts: Wash with whites or other suitable light garments. Colored garments: Wash with similar colors. Delicate pieces: Wash separately according to their care instructions. Avoid overcrowding the washing machine because clothes need enough room for water and detergent to circulate properly. Pre-Treat Stains Before Washing School uniforms can collect stubborn stains throughout the day. Treating a stain before washing gives you a better chance of removing it completely. For fresh stains, gently remove any excess material without rubbing it deeper into the fabric. Apply an appropriate stain-treatment method according to the garment’s care instructions, then allow it to work before washing. Common school-uniform stains include: Food and drink Grass Mud Ink Sweat Makeup Grease Dirt Always test a stain-removal method on a hidden area first, particularly when working with colored or delicate fabrics. Choose the Right Washing Temperature The hottest setting is not automatically the best setting. Higher temperatures can cause some fabrics to shrink, fade, weaken, or lose their shape. For many everyday school uniforms, a cooler or moderate wash may be sufficient when the garment’s care label allows it. Use the temperature recommended on the care label rather than choosing a hotter cycle simply because the uniform looks dirty. Use the Correct Amount of Laundry Detergent Using more detergent does not necessarily make clothes cleaner. Too much detergent can leave residue on fabric and may make clothes feel stiff or less fresh. Use the amount recommended for: The detergent you are using The size of the laundry load The level of soiling Your water conditions The washing machine instructions For heavily soiled uniforms, pre-treating specific stains is often more useful than simply adding extra detergent. Turn Dark Uniforms Inside Out Turning dark trousers, skirts, sweaters, and other garments inside out before washing can help reduce direct friction on the outer surface. This can be particularly useful for uniforms that are washed frequently. It may also help protect printed designs, embroidery, and other decorative details from unnecessary wear. Use a Gentle Cycle for Delicate Uniform Pieces Not every part of a school uniform should necessarily be washed using the same cycle. Delicate items, knitted garments, wool pieces, and other sensitive fabrics may require a gentler cycle or hand washing. If the care label recommends a specific cycle, follow it. Avoid treating delicate garments like heavy-duty school trousers or cotton shirts. Avoid Overloading the Washing Machine An overloaded washing machine may not clean clothes effectively because the garments cannot move freely. A crowded drum can also increase friction between garments, which may contribute to fabric wear and wrinkles. Leave enough space for the clothes to move during the wash cycle and follow your washing machine manufacturer’s recommendations for load size. Be Careful With Bleach Bleach can damage some colored fabrics and may weaken certain fibers. It should never be used automatically just because a uniform has a difficult stain. Always check the garment’s care label before using any bleaching product. For colored uniforms, avoid bleach unless the manufacturer specifically indicates that it is safe. How to Wash White School Shirts White school shirts often require frequent washing because they can show sweat, food, dirt, and other marks easily. For best results: Check the care label. Separate white shirts from colored garments. Pre-treat visible stains. Use the recommended amount of detergent. Wash at the temperature recommended on the label. Inspect the shirt before drying. Treat remaining stains again rather than automatically drying them. Avoid drying a stained shirt until you are satisfied with the stain-removal result, because heat can make some stains more difficult to remove. How to Wash School Trousers and Skirts School trousers and skirts may be made from polyester blends, wool blends, cotton, or other materials. Turn them inside out when appropriate, fasten closures, and select the recommended wash cycle. Avoid excessive heat when washing or drying unless the care instructions specifically allow it. This can help reduce unnecessary fading, shrinking, and fabric stress. How to Wash School Sweaters and Knitwear Sweaters and knitwear often need more careful handling than standard shirts. Check whether the garment requires: Cold
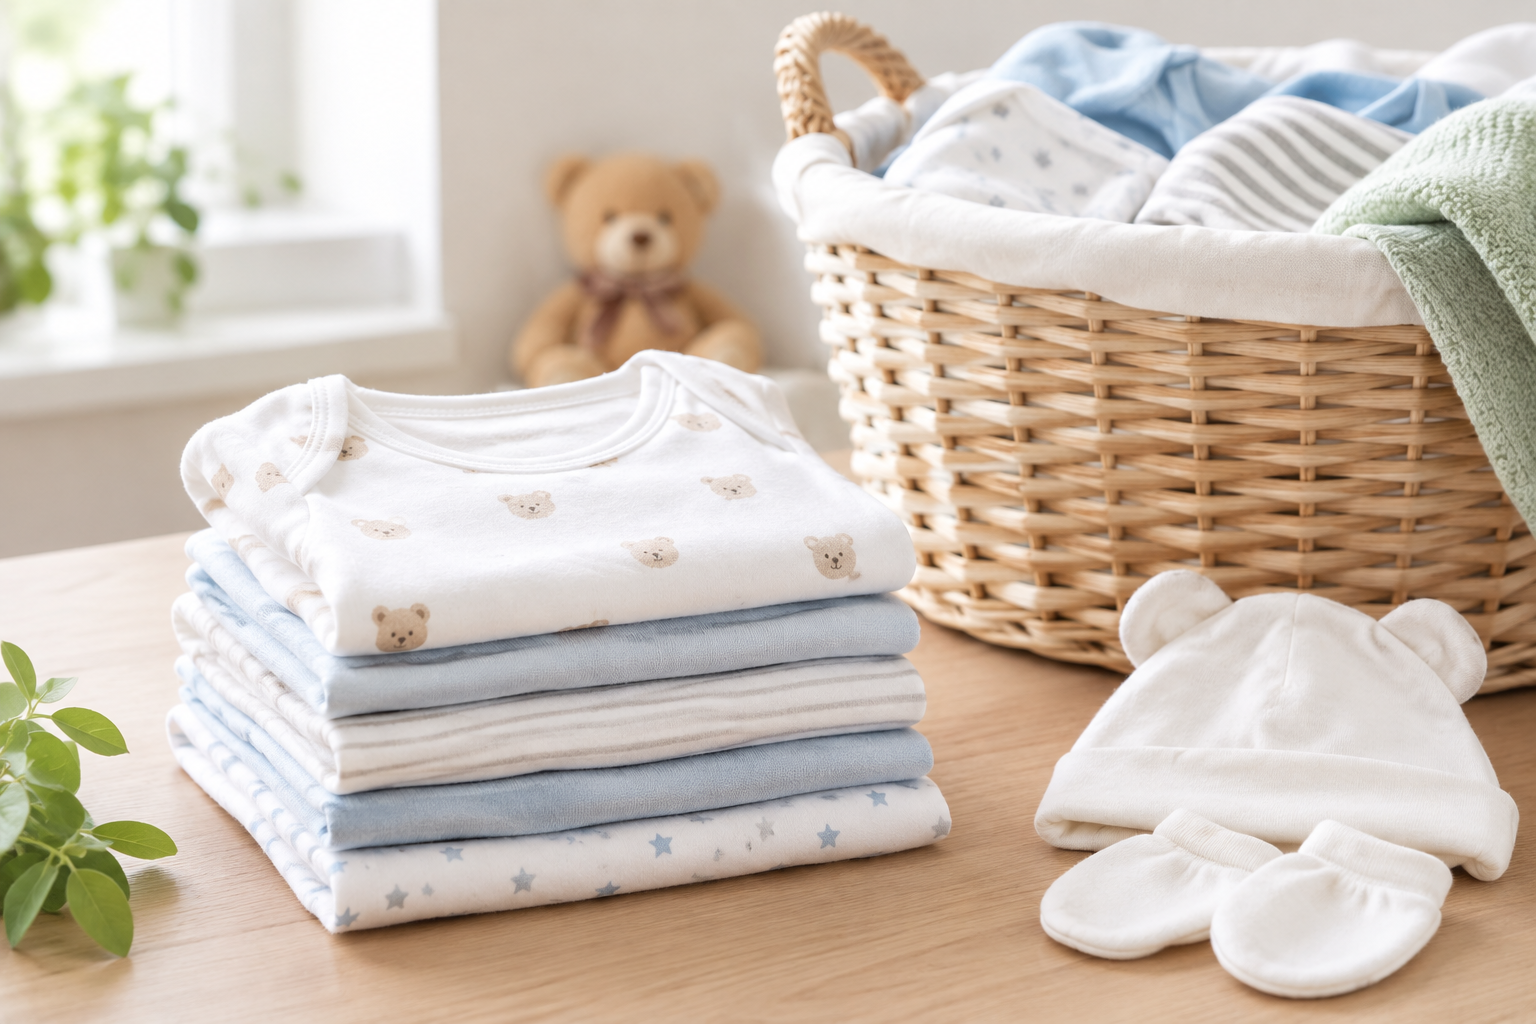
How to Wash Baby Clothes Before the First Wear Those tiny outfits look soft and clean on the rack, so skipping the first wash can be tempting. However, how to wash baby clothes matters because newborn skin is delicate and new garments may carry dust, dyes, finishing residues, or other substances from manufacturing and handling. This guide explains how to wash baby clothes before first wear, which detergent to choose, what water temperature to use, and how to handle hand-washing, sensitive skin, and second-hand pieces. Should You Wash Baby Clothes Before Wearing Them? Yes, washing new baby clothes before wearing them is strongly recommended, especially for newborns. Garments can pick up dust, lint, and skin oils during manufacturing, transportation, storage, and shopping. Some fabrics may also contain finishing agents or excess dye from the manufacturing process. A first wash helps remove much of this residue and makes the fabric feel fresher against your baby’s skin. It cannot remove every possible substance, but it is a simple precaution that can help reduce unnecessary irritation. How Long Before Birth Should You Wash Baby Clothes? Most parents can start washing baby clothes during the third trimester. Around three to four weeks before the due date gives you enough time to prepare the essentials without rushing. Start with the items that will touch your baby’s skin most often, including: Sleepers and onesies Hats and mittens Swaddles Burp cloths Receiving blankets Crib or bassinet bedding Having these items clean and ready also makes the first few days at home easier to manage. How to Wash New Baby Clothes: Step by Step If you’re wondering how to wash newborn clothes for the first time, follow this simple routine. 1. Remove tags and check the clothing Take off price tags, stickers, and anything that could scratch your baby’s skin. Check for loose threads, buttons, snaps, or decorative pieces that could become detached. 2. Read the care label Before putting anything into the washing machine, check the manufacturer’s instructions. Delicate knits, wool, and special fabrics may require a lower temperature or a different washing method. 3. Sort the clothes Separate whites, lights, and dark colors. New brightly colored or dark garments can sometimes release excess dye during their first wash. For questionable fabrics, test colorfastness by dabbing a damp white cloth on a hidden area. 4. Use a gentle detergent Choose a fragrance-free detergent designed for sensitive skin. You generally don’t need a large amount. Using too much detergent can leave residue behind, which may irritate sensitive skin. 5. Choose a gentle cycle For most baby clothes, a gentle or normal cycle based on the care label is appropriate. Avoid unnecessarily harsh washing settings that could damage delicate fabrics. 6. Add an extra rinse An additional rinse can help remove leftover detergent from the fabric. This can be particularly useful when washing clothes for a baby with sensitive skin. 7. Dry the clothes thoroughly Follow the care label when choosing between tumble drying and air drying. Low-heat tumble drying or air drying is suitable for many baby garments. Make sure everything is completely dry before folding and storing it. What Temperature Should You Wash Baby Clothes? For many new baby clothes, warm water around 30 to 40°C (86 to 104°F) is a practical starting point. It can provide effective cleaning while being gentler on many fabrics than very hot water. The care label should always take priority. Some garments may require cold water, while others can tolerate hotter temperatures. For second-hand clothing or heavily soiled items, a warmer wash may be appropriate if the fabric’s care instructions allow it. How Many Times Should You Wash New Baby Clothes? For most garments, one thorough wash before the first wear is sufficient. A second wash can be considered if the clothing has a strong manufacturing smell, feels stiff after washing, or is intended for a baby with particularly sensitive skin. Heavily dyed garments may also benefit from another rinse or wash if they continue releasing color. Can You Wash Baby Clothes With Regular Detergent? Yes. Baby clothes do not necessarily require a detergent specifically marketed for babies. The important factors are the detergent’s ingredients and how well it rinses from fabric. For newborn laundry, look for a gentle formula that is: Fragrance-free Dye-free Suitable for sensitive skin Easy to rinse away Free from unnecessary harsh additives If your baby develops persistent redness, dryness, or irritation, consider changing your laundry products and speak with your pediatrician for personalized advice. Do Baby Clothes Need Special Detergent? Not necessarily. A standard fragrance-free detergent that is suitable for sensitive skin can work well. Products labeled “baby detergent” are not automatically better simply because of the label. Instead, check the ingredients and choose a formula that avoids strong fragrances and unnecessary additives. Best Detergent for Baby Clothes The best detergent for baby clothes is one that cleans effectively without leaving a strong fragrance or excessive residue. When shopping for baby laundry detergent, look for: Fragrance-free formulas Dye-free formulas Hypoallergenic options Sensitive-skin formulas Clearly listed ingredients Detergents that rinse cleanly If you’re interested in a more environmentally conscious option, you can also compare an eco-friendly laundry detergent with your current product. Skip fabric softener when washing baby clothes. Fabric softeners can leave a coating on fabric and may irritate sensitive skin. They can also reduce the absorbency of items such as cloth diapers and burp cloths. For children’s sleepwear, follow the garment’s care instructions carefully because some treatments can affect the fabric’s required flame-resistance properties. Can You Wash Baby Clothes With Adult Clothes? Yes, baby clothes can generally be washed with adult clothes once you’ve established a suitable laundry routine. For the first wash, keeping new baby items separate makes it easier to control the detergent, temperature, and cycle. Afterward, combining loads is generally practical when the adult clothing isn’t heavily soiled and you’re using a gentle, fragrance-free detergent. Families dealing with particularly sensitive skin may prefer to keep a separate baby laundry routine for
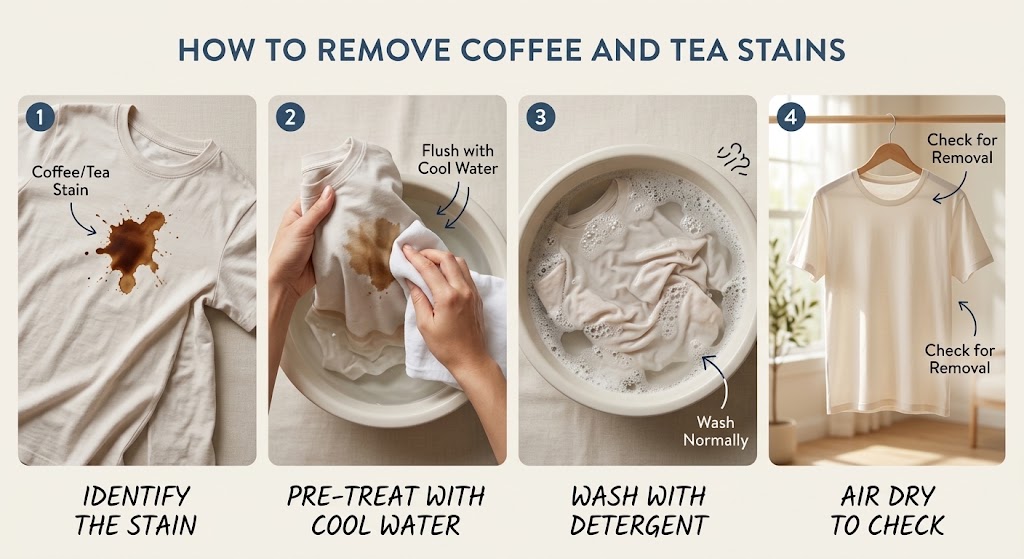
Everyone has done it. You grab your morning cup, hit a bump, and now there’s a brown splash across your favourite shirt. The good news: you can remove coffee stain from clothes at home, and tea stains come out the same way. The trick is knowing what the stain is made of, how fresh it is, and what fabric you’re dealing with. This guide covers fresh spills, old dried stains, white shirts, and delicate fabrics like linen and silk, so you can pick the right method the first time. Why Coffee and Tea Stains Are So Stubborn (Tannin Stain Removal Basics) Coffee and tea both contain tannins, natural plant compounds that give the drinks their colour and slight bitterness. Tannins bind easily to fabric fibres, especially natural ones like cotton and linen, and they darken and set over time. That’s why tannin stain removal works best when you follow three rules: Act fast. Fresh stains lift far more easily than old ones. Avoid heat. Hot water on an untreated stain, or a tumble dryer, can lock the stain in. Use an oxidiser. Tannin stains are bleachable, so detergents with oxygen bleach or a little hydrogen peroxide work well on suitable fabrics. Quick Steps to Remove Coffee Stain From Clothes When It’s Fresh If the spill just happened, do this straight away: Blot, don’t rub. Press a clean cloth or paper towel on the stain to soak up the liquid. Rubbing pushes it deeper and spreads it. Flush with cold water from the back. Run cold water through the reverse side of the fabric so the stain is pushed out, not further in. Apply liquid detergent. Work a small amount into the stain with your fingers and leave it for 5 to 10 minutes. Wash as normal. Use the warmest water the care label allows. Check before drying. If any brown shadow remains, repeat the treatment. Only dry the garment once the stain is fully gone. Most fresh stains come out after one wash if you follow these steps. How to Remove Tea Stain From a White Shirt White shirts show every drop, and tea leaves a yellow-brown tint that can look worse than coffee. To remove a tea stain from a white shirt: Blot the excess and rinse the back of the stain with cold water. Soak the shirt in lukewarm water with a scoop of oxygen-based whitener or your regular detergent for 30 to 60 minutes. For leftover marks, dab on a solution of 1 part 3% hydrogen peroxide to 2 parts water and leave it for 10 minutes. Rinse, then wash on the hottest setting the label allows. Air dry and check the stain in daylight before using the dryer. Note: Hydrogen peroxide can lighten coloured fabrics. Use it on whites or colourfast items only, and test a hidden spot first. Old or Dried Coffee Stain Removal: What Actually Works A stain that has been sitting for days, or has already been through the dryer, is tougher but not hopeless. For old coffee stain removal, you need more time and a stronger soak. Step-by-step for old stains Pre-soak. Mix lukewarm water with a good laundry detergent or oxygen bleach and soak the garment for at least an hour. Stubborn stains may need an overnight soak. Pre-treat. Rub a little liquid detergent directly into the stain. Wash. Use the hottest water safe for the fabric. Repeat if needed. Old stains often need two rounds. Don’t dry until the mark is gone. Does coffee stain come out after drying? Sometimes, yes. Heat from a dryer sets the tannins, so the stain becomes harder to remove, but it’s still worth trying. Re-wet the area, treat it with detergent, and do a long oxygen-bleach soak. Results are best on white and colourfast cotton. If the stain has been set through several dry cycles, expect it to fade rather than vanish completely. Coffee Stain Remedies: Baking Soda, Vinegar and Hydrogen Peroxide These household ingredients can help, especially when you don’t have a stain remover on hand. Here’s how each one works and when to use it. Coffee stain and baking soda Baking soda acts as a mild abrasive and helps absorb moisture. Mix it with a few drops of water to make a thick paste, spread it on the stain, and gently rub it in with your fingers or a soft brush. Leave it for 30 minutes, rinse, then wash as usual. It’s best for light, fresh stains on sturdy fabrics. Coffee stain and white vinegar White vinegar is mildly acidic and can loosen tannins. Mix equal parts white vinegar and cold water, dab it onto the stain with a cloth, let it sit for 10 to 15 minutes, then rinse and wash. Vinegar is a gentle option for fresh stains and is a good first step before detergent. Coffee stain and hydrogen peroxide 3% hydrogen peroxide is the strongest of the three and works well on white cotton. Dilute it with water (1 part peroxide to 2 parts water), apply, wait 10 minutes, then rinse and wash. Always test on a hidden area first, since it can bleach dyes. Remedy Best for Strength Avoid on Baking soda paste Fresh, light stains Mild Delicate weaves you can’t scrub White vinegar + water Fresh stains, first-aid step Mild to medium Silk (use only if care label allows) Hydrogen peroxide (3%, diluted) Old stains on whites Strong Coloured fabrics, silk, wool How to Remove Coffee Stain on Cotton, Linen and Silk The right method depends on the fabric. Always read the care label first. Cotton Cotton is the easiest. It handles warm water, liquid detergent, oxygen bleach, and repeated washing. For white cotton, hydrogen peroxide is safe when diluted. For coloured cotton, stick to detergent and oxygen bleach after a colourfast test. Linen Linen is strong but wrinkles and can lose colour with harsh treatment. Blot, rinse with cold water, and apply liquid detergent. Soak in lukewarm water with a gentle oxygen-based cleaner
Small adjustments such as cold water, mesh bags, air drying, and proper folding can help clothes keep their shape wash after wash. Another useful step is learning what the symbols on clothing care labels mean before washing each garment. Our laundry symbols guide explains common washing, drying, bleaching, and ironing symbols. Why Do Clothes Stretch After Washing? Before jumping into fixes, it helps to understand the cause. Fabric fibers absorb water and expand during washing. When they’re agitated too roughly, spun too fast, or hung up while still wet and heavy, those fibers can stretch out and don’t always bounce back. Heat from dryers can make things worse by relaxing elastic fibers permanently. Understanding these causes makes it easier to learn how to prevent clothes from stretching. How to Keep Clothes From Losing Shape in the Wash Sort Fabrics by Weight and Type Heavy items like jeans or towels can pull and stretch lighter garments when washed together. Separate delicates, knits, and stretchy fabrics from heavier pieces to avoid unnecessary strain and help prevent clothes from stretching. Use Cold Water and a Gentle Cycle Gentle cycle vs regular cycle for clothes makes a real difference. Regular cycles use faster spins and more aggressive agitation, which can stretch fibers over time. Cold water on a gentle cycle keeps fabric relaxed and helps prevent unwanted stretching. Turn Sweaters and Knits Inside Out This simple step is one of the easiest ways to learn how to stop sweaters from stretching. It reduces friction on the outer fibers and protects the shape of the garment during agitation. Choose a Gentle, Fabric-Friendly Detergent Harsh detergents can weaken fibers over repeated washes, making them more prone to stretching. A gentle, fabric-friendly detergent can clean effectively while helping protect elastic and natural fibers. How to Wash Clothes Without Stretching Them Don’t Overload the Washing Machine A packed machine forces clothes to twist and pull against each other. Leave enough room for water and detergent to move freely. This is one of the simplest laundry tips to preserve fabric and prevent clothes from losing their shape. Use a Mesh Laundry Bag for Delicates Bras, knitwear, and stretchy activewear can benefit from being washed inside a mesh laundry bag. The bag helps limit stretching, tangling, and unnecessary friction. How to Dry Clothes Without Stretching Prevent Clothes From Stretching in the Dryer High heat is one of the biggest problems when trying to prevent clothes from stretching. Use a low-heat or air-dry setting whenever possible, and remove items while they’re still slightly damp. Air Drying vs Machine Drying: Which Protects Shape Better? Air drying vs machine drying clothes is a common question when caring for delicate fabrics. For shape retention, air drying is generally the gentler option. When drying knits and stretchy fabrics, lay them flat on a drying rack rather than hanging them. Gravity can pull damp, heavy fabric downward, causing the shoulders and hem to stretch. Reshape Garments While Damp Gently reshape sweaters, t-shirts, and dresses back to their original size right after washing, then let them dry flat. This helps the garment maintain its intended shape as it dries. How to Maintain Clothing Shape Long-Term Store Clothes to Keep Their Shape Knowing how to store clothes to keep their shape matters as much as how you wash them. Fold sweaters and heavy knits instead of hanging them. Hangers can cause shoulder stretching and shape distortion over time. Use padded hangers for structured items like blazers. Fold, Don’t Hang, Stretch-Prone Items Reserve hangers for shirts, jackets, and pants. Sweaters, bras, and knitwear should generally be folded to reduce gravity-related stretching. Rotate Your Wardrobe Wearing the same pieces too often can speed up fabric fatigue. Rotating your clothes gives the fabric time to recover its shape between wears and can help prevent clothes from stretching prematurely. Clothes Stretched Out? How to Fix Them If damage is already done, not all hope is lost. For natural fibers like cotton or wool, soak the item in lukewarm water with a small amount of gentle detergent for 15–20 minutes. Then reshape it while damp and lay it flat to dry. This approach may help mildly stretched natural-fiber garments, although it won’t reliably restore badly overstretched synthetic fibers. Final Thoughts Preventing clothes from stretching comes down to three things: gentler washing, smarter drying, and better storage. Small adjustments such as cold water, mesh bags, air drying, and proper folding can help clothes keep their shape wash after wash. You can also learn more about proper clothing-care symbols in our laundry symbols guide. For additional information about clothing care labels, you can also refer to the Federal Trade Commission’s care-labeling information. SHOP NOW
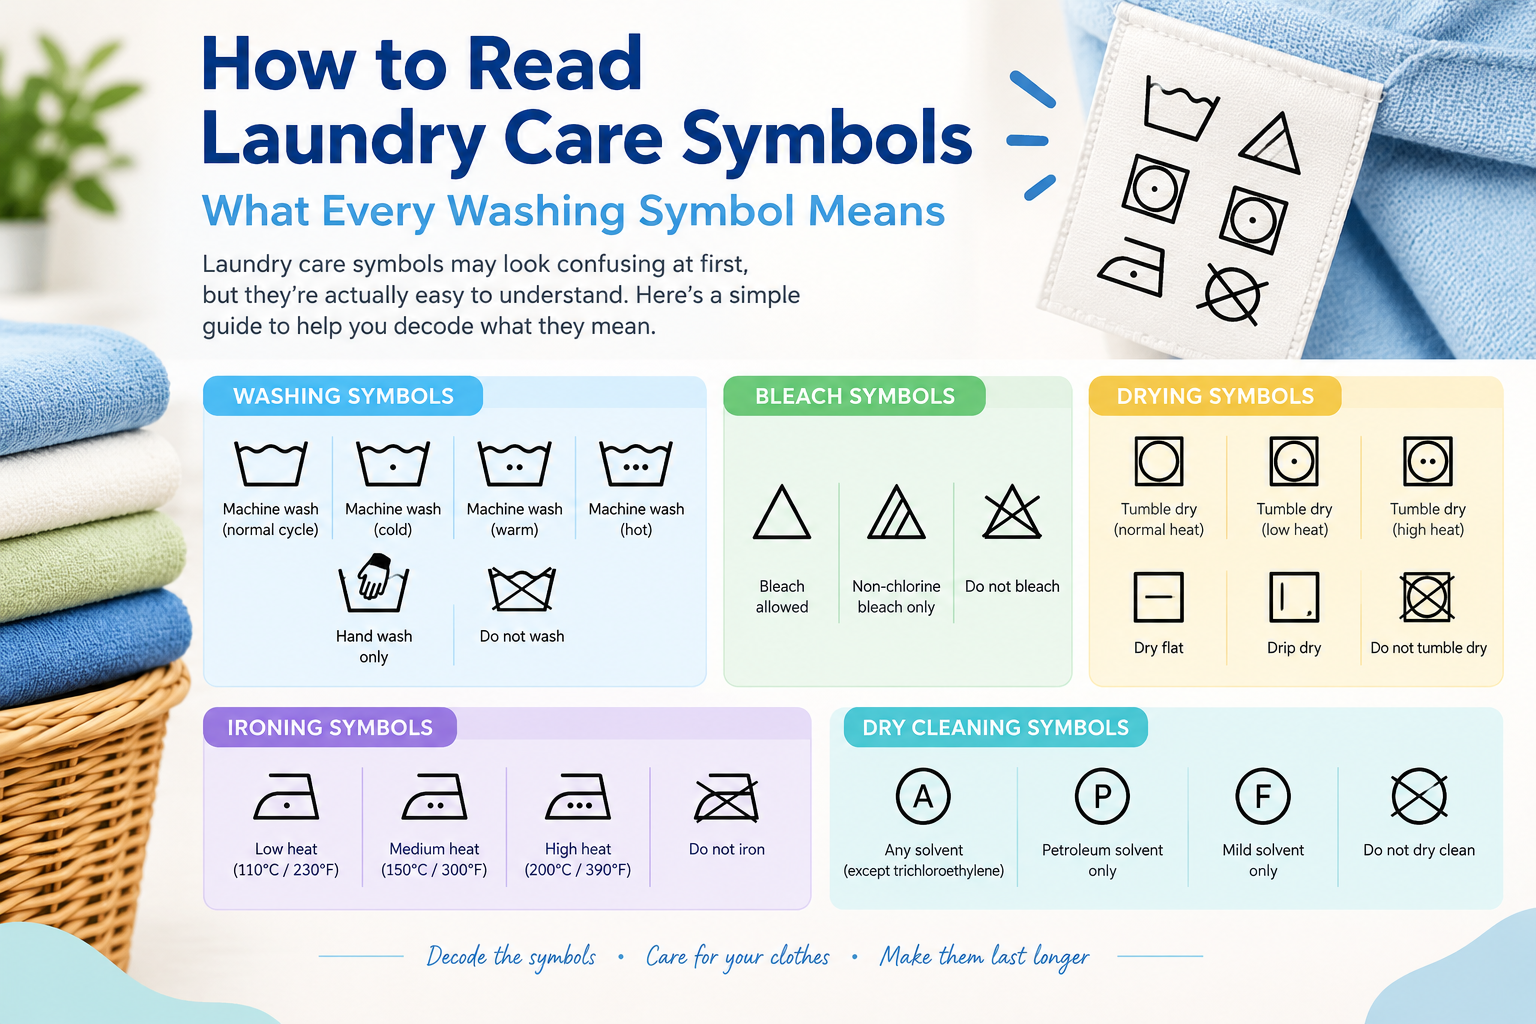
Laundry Symbols Explained: What Every Washing Care Label Means Every piece of clothing has a small tag. That tag carries tiny pictures that many people ignore. However, those icons aren’t decoration. They’re instructions. Manufacturers add them so you know how to wash, dry, bleach, and iron the fabric without damaging it. If you skip them often enough, you could shrink a favorite sweater. You might also bleed color across a white shirt. Worse, you could melt delicate fibers under a hot iron. Fortunately, understanding these symbols is easier than it looks. This guide breaks down every laundry symbol by category. Once you learn them, you’ll know exactly what any care tag is asking you to do. Why Laundry Symbols Exist in the First Place Clothing brands sell their products across dozens of countries. Because not everyone speaks the same language, manufacturers need a simple way to communicate care instructions. Therefore, the textile industry uses a universal picture system. This system follows international standards, allowing care symbols to communicate instructions without relying on written language. For example, a symbol on a shirt made in Portugal can communicate the same type of care instruction as that symbol on a shirt made in Vietnam. As a result, you can learn the icons once and use that knowledge when caring for clothing from almost any brand or country. In general, the symbols use five basic shapes. Each shape governs one part of the laundering process. A tub means washing, while a triangle means bleaching. Similarly, a square means drying, an iron means pressing, and a circle means professional cleaning. In addition, extra marks such as dots, lines, or an X provide more specific instructions. Washing Symbols: The Tub Shape The washtub icon looks like a small basin filled with water. Usually, it is the first symbol on a care tag. This shape controls the washing method and water temperature. A plain tub with no numbers or dots generally means machine washing is allowed without a special temperature indication. However, dots inside the tub indicate the maximum water temperature. In general, more dots mean that a higher temperature is permitted. Some tags, particularly on European-made clothing, display the exact temperature in Celsius instead of using dots. Additionally, a line under the tub calls for a gentler cycle. Two lines mean an even more delicate, low-agitation setting. Meanwhile, a hand dipped into the tub means hand wash only, so you should skip the washing machine entirely. Finally, an X through the tub means the garment should not be washed with water at all. In that case, the item may require professional cleaning. Bleaching Symbols: The Triangle Shape The triangle shape covers bleach instructions. Because it is small, people often miss it. However, checking this symbol before treating stains can prevent serious fabric damage. An empty, unmarked triangle means bleach can be used. On the other hand, two diagonal lines inside the triangle limit you to oxygen-based, non-chlorine bleach. Therefore, using chlorine bleach on a garment with this symbol could cause discoloration or weaken the fibers. Finally, a triangle with an X through it means no bleach at all. You’ll often see this warning on colored fabrics, wool, and synthetic blends that may react poorly to bleaching agents. Drying Symbols: The Square Shape The square icon handles drying instructions. When you see a circle inside the square, the garment can generally be tumble dried. In addition, dots inside that circle indicate the heat level. Fewer dots mean lower heat, which is especially important for synthetic fabrics that can warp or become damaged under high temperatures. On the other hand, a plain square with no circle points to air-drying instead. A horizontal line through the square means the item should be laid flat. This is particularly important for knits and sweaters because laying them flat can help prevent stretching. Similarly, a curved line near the top of the square indicates line drying or drip drying, depending on the specific symbol. Finally, an X through the circle means never tumble dry the garment, even on a low-heat setting. Ironing Symbols: The Iron Shape The ironing symbol is one of the easiest to recognize because it looks like an actual iron. As with washing and drying symbols, dots inside the shape indicate the maximum safe heat. One dot means use the lowest heat setting, which is generally suitable for synthetics and delicate fabrics. Two dots indicate medium heat, which is suitable for many cotton-polyester blends. Meanwhile, three dots allow the highest heat setting, which is commonly used for fabrics such as cotton or linen when permitted by the care label. However, an iron with an X through it means don’t iron the item at all. This warning is especially important for garments with plastic prints, sequins, or heat-sensitive synthetic materials that could scorch or melt. Professional Cleaning Symbols: The Circle Shape The circle shape indicates professional cleaning instructions. In other words, the garment may require a professional cleaning process rather than normal home laundering. An empty circle means the item can be professionally dry-cleaned. Meanwhile, a letter inside the circle provides information about the cleaning process or solvent that the professional cleaner should use. In contrast, an X through the circle means the garment should not be dry-cleaned. You may see this warning on certain plastics, vinyl trims, and specialty coatings that can be damaged by cleaning solvents. Additionally, a circle containing a W indicates professional wet cleaning, which is a specialized cleaning process offered by some professional cleaners. Reading Multiple Symbols Together Care tags rarely show just one symbol. Instead, most tags display four or five symbols in a row. Generally, you can read them from left to right in this order: wash, bleach, dry, iron, and professional cleaning. For example, imagine a tag with a tub showing two dots, a triangle with two lines, a square with a circle and one dot, and an iron with two dots. Together, these symbols indicate that the garment can

Most laundry mistakes that ruin clothes aren’t dramatic — no bleach spill, no shrunk sweater drama. Instead, they’re small, repeated habits: a scoop of detergent too many, a dryer cycle left on high, a care label nobody read. Fortunately, fixing these habits makes clothes last noticeably longer. As a result, less waste ends up in landfills, and you make fewer replacement purchases. Washing Mistakes That Damage Fabric First, this group covers the most common laundry mistakes to avoid at the washing stage, before clothes ever reach the dryer. 1. Overloading the Washing Machine Cramming in one more load to save time is one of the most common laundry mistakes to avoid. After all, clothes need room to move freely through the water and detergent. Otherwise, an overloaded drum can’t rinse properly, and soap residue builds up, stiffening fabric and irritating skin. For best results, fill the drum to about 75% capacity, leaving room for clothes to tumble. If you can’t see any water movement when the cycle starts, simply split the load. 2. Using Too Much Detergent More suds does not mean cleaner clothes. In fact, using too much detergent is a classic laundry mistake that damages fabric over time. Residue builds up in fibers, dulls colors, and can even void warranties on high-efficiency machines. Quick Fix Instead, follow the fill line on the cap, not your instinct. For HE machines, use HE-labeled detergent, since it’s formulated for low-water, low-suds cycles. 3. Choosing the Wrong Water Temperature Wrong water temperature laundry choices are an easy trap. For example, hot water on delicates shrinks and fades them. Meanwhile, cold water alone won’t fully dissolve some detergents or lift oil-based stains. Quick Fix Generally, use cold for dark or delicate items and warm for everyday mixed loads. Save hot water only for whites, towels, or heavily soiled fabrics that can handle it. 4. Skipping the Sorting Step Not sorting laundry by fabric or color is one of those laundry mistakes that fade clothes fastest. For instance, dark dyes bleed onto lighter fabrics. Additionally, heavy items like jeans can snag or pill delicate ones during the spin cycle. Quick Fix First, sort by color, then by fabric weight. Also, keep zippers, hooks, and heavy denim separate from anything delicate or light-colored. 5. Ignoring Care Labels Skipping the label is one of the fastest ways to make laundry mistakes that ruin clothes outright. For example, a “dry clean only” sweater tossed in a hot wash can shrink two sizes in one cycle. Quick Fix Therefore, check the label before the first wash, and keep a mental note for high-value items. When in doubt, wash colder and gentler than you think you need to. Drying Mistakes That Shrink and Fade Clothes However, even a perfect wash cycle can be undone by the dryer. In fact, these laundry mistakes that shrink clothes are just as common as washing errors. 6. Over-Drying on High Heat High heat is the single biggest cause of shrinkage in cotton and wool blends. Additionally, it accelerates elastic breakdown in activewear. 7. Leaving Wet Clothes in the Machine Too Long Wet fabric left sitting develops a musty smell and mildew risk. Meanwhile, wrinkles set in that are harder to remove later. 8. Not Cleaning the Lint Trap A clogged lint trap restricts airflow and extends drying time. Worse, it’s a genuine fire hazard — one of the maintenance-related laundry mistakes people underestimate most. 9. Drying Delicates in the Dryer Similarly, lace, activewear, and anything with elastic loses shape fast under dryer heat and tumbling. 10. Overloading the Dryer Just like the washer, a packed dryer can’t circulate hot air evenly. As a result, some items come out damp while others get overdried. How to Avoid Laundry Mistakes at the Drying Stage Use medium or low heat as your default, and clean the lint trap every load. Also, pull anything delicate out for air-drying. Overall, these are simple laundry tips to protect clothes that take seconds to build into a routine. Stain and Detergent Mistakes Next, these habits around stains and detergent decide whether marks come out clean or set in permanently. 11. Rubbing Instead of Blotting Stains Instead, rubbing pushes a stain deeper into fibers and spreads it wider rather than lifting it out. 12. Using Fabric Softener on Everything Fabric softener mistakes are easy to make. Over time, softener coats towels and activewear in a waxy layer that kills absorbency and moisture-wicking. 13. Not Pre-Treating Stains Throwing a stained item straight into a normal cycle without pre-treatment is risky. Once it hits the dryer’s heat, the stain often sets permanently. Storage and Maintenance Mistakes Finally, a few storage and maintenance habits round out the list. 14. Skipping Washing Machine Maintenance A machine that’s never cleaned builds up detergent film and mildew inside the drum. Consequently, that residue transfers back onto every load — including your towels. 15. Ignoring Zippers, Buttons and Closures Leaving zippers undone and buttons unfastened lets them snag other fabrics in the wash. Meanwhile, the closures themselves lose shape — one of the more overlooked laundry mistakes that ruin towels and knitwear alike. Eco-Friendly Laundry Mistakes to Avoid Beyond fabric damage, plenty of eco-friendly laundry mistakes quietly increase water, energy, and chemical waste. For example, running half-empty loads, defaulting to hot water when cold would do, and reaching for heavily fragranced detergents all add up. Fortunately, switching to a concentrated, plant-based option fixes several laundry detergent mistakes at once. As a result, you need less product per load, fewer synthetic residues stay in fabric, and less packaging ends up as waste. How to Wash Clothes Without Ruining Them Naturally Cold-water washing, air-drying when possible, and a biodegradable detergent formulated for both HE and standard machines cover most of what’s above. In short, avoiding laundry mistakes and going eco-friendly are usually the same habit. Frequently Asked Questions What is the most common laundry mistake? Overloading the washing machine is consistently the most common laundry mistake. After all, it
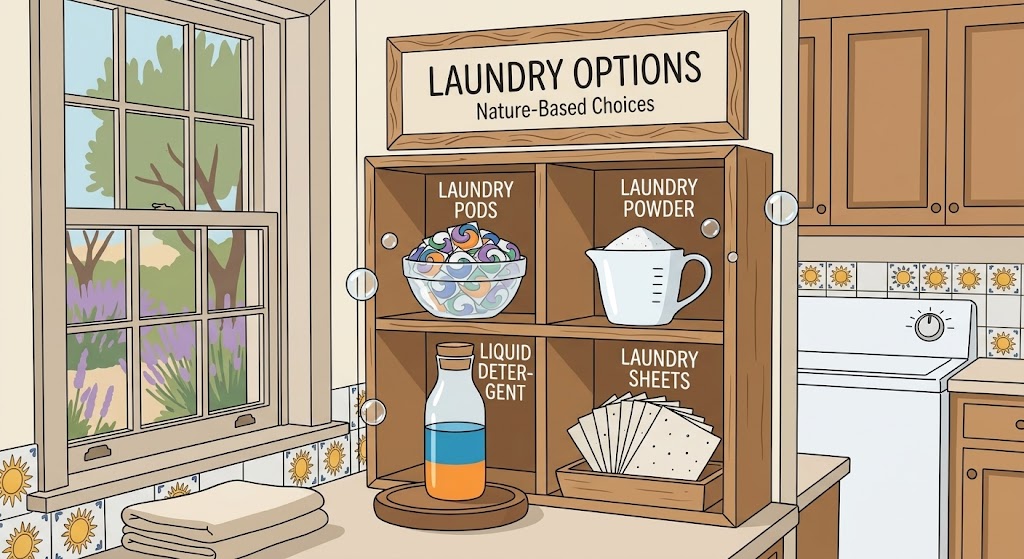
Finding the best laundry detergent for your home usually comes down to one aisle-standing question: pods, liquid, or powder? Each format, after all, promises the cleanest clothes with the least effort. However, they don’t all perform the same way, and as a result, the best laundry detergent for you really depends on your washer, your water, and your habits. In this guide, we compare the best laundry detergent options in each format — pods, liquid, and powder — across cleaning power, cost per load, convenience, and machine compatibility. Afterward, you’ll be able to pick the one that actually fits your routine, instead of just the one with the flashiest packaging. Quick Comparison: The Best Laundry Detergent by Category Before diving into the details, here’s an overview so you can see how the three formats stack up at a glance. Factor Pods Liquid Powder Convenience Highest — pre-measured, no mess Medium — measuring cup needed Medium — measuring cup needed Stain removal (grease/oil) Good Best Good Stain removal (dirt/clay/mud) Good Good Best Cost per load Highest Medium Lowest Cold water performance Good Best Weaker (can leave residue) Hard water performance Good Good Best Storage Compact, must be childproofed Bulky, can leak Bulky, needs to stay dry Best for Busy households, portion control Stain-prone loads, cold washes Budget shoppers, hard water areas Pods: The Most Convenient Laundry Detergent Pods are single-use packets of concentrated detergent sealed in a dissolvable film. For many households looking for the best laundry detergent with zero measuring or mess, pods are, above all, the default answer. In short, you toss one in, start the wash, and you’re done. Strengths First, the pre-measured doses eliminate over- or under-dosing, which, in turn, improves consistency load to load. Additionally, pods are compact and mess-free, and therefore ideal for small storage spaces or for households doing laundry away from home, such as dorms or laundromats. Overall, pods also offer good general-purpose cleaning performance for everyday dirt and body soil. Weaknesses On the other hand, cost per load is typically the highest of the three formats. Furthermore, pods aren’t ideal for very large loads or heavily soiled items, since you can’t adjust the dose down or up as easily. More importantly, pods also pose a serious poisoning and choking risk to young children and pets if swallowed, so, as a result, they need to be stored well out of reach. In fact, according to Consumer Reports’ detergent testing, pod safety remains an ongoing concern for households with young children or cognitively impaired adults. Finally, some pods also dissolve poorly in cold, short, or low-water-level cycles, which can occasionally leave residue on dark clothing. Best For Ultimately, pods suit people who want zero-thought laundry — grab, drop, done — and who, therefore, don’t mind paying a premium for that convenience. Liquid: A Strong All-Round Detergent Choice Liquid detergent has been the category leader for decades because it dissolves easily in any water temperature. Moreover, it’s genuinely strong against oil and grease-based stains, such as cooking oil, makeup, or salad dressing. Consequently, for cold-water washing, liquid is generally considered the best laundry detergent format available. Strengths First of all, it dissolves fully even in cold water, making it the safest bet for cold-wash routines. Also, it can be applied directly to stains as a pre-treatment before the wash cycle, which pods and powder can’t do as easily. In addition, dosing is flexible: for instance, you can add more for heavily soiled loads or scale back for lightly worn clothes. Weaknesses That said, liquid requires a measuring cup, and, as a result, it’s easy to overpour, which wastes product and can leave residue. Likewise, bottles are bulky, heavy, and prone to drips and leaks in storage. Overall, liquid also tends to be mid-range to premium in cost per load compared to powder. Best For As a result, liquid works best for households dealing with regular grease or oil stains, or for anyone who washes primarily in cold water. Powder: The Budget-Friendly Laundry Detergent Pick Powder is the original laundry detergent format, and for hard water households on a budget, it’s, therefore, often still the best laundry detergent choice on price and mineral-fighting power. Strengths To begin with, powder is usually the cheapest per load, especially when bought in bulk. It also contains water-softening agents that work well in hard water areas, which, in turn, helps prevent mineral buildup in the machine over time. Furthermore, powder is excellent at lifting dirt, mud, and clay-based stains. Finally, it also has a long shelf life since there’s no liquid to degrade or separate. Weaknesses However, powder doesn’t dissolve as reliably in cold water, which, as a result, can leave a chalky residue on dark or synthetic fabrics. In addition, it’s not recommended for some HE top-load machines unless labeled HE-compatible, since undissolved powder can clog dispensers. Also, its packaging is bulky and needs to be kept dry, since moisture causes clumping. Best For Consequently, powder is best for budget-conscious shoppers, hard water households, and anyone regularly dealing with dirt or mud stains, such as sports gear, kids’ clothes, or gardening clothes. So, Which Is the Best Laundry Detergent for You? Overall, there’s no single winner. Instead, the best laundry detergent for you depends on three questions: 1. What water temperature do you wash in? For instance, cold-water washers should lean toward liquid, while, in contrast, powder performs best in warm or hot cycles. 2. What’s your water hardness? Similarly, hard water areas, in particular, benefit from powder’s built-in softening agents. 3. How much do you value convenience vs. cost? In contrast, if convenience matters most, pods win; on the other hand, if price matters most, powder wins. Practical Approach Therefore, a practical approach many households use to land on the best laundry detergent routine is this: liquid for delicates and stain pre-treatment, powder for towels and bedding and hard water loads, and pods for travel or whenever convenience matters most. In other words, you don’t have to